Sunday, July 25, 2010

The table. Oh the table.

So, it took us longer than I thought to get our new dining room table all put together. First we had to get a better drill since the one we have is meant for smaller projects and the battery crapped out constantly with all the pressure we were putting on it. Then we needed new pilot bits because we broke two... yes TWO... of the ones we had. Take my word on this: do not go cheap when it comes to tools and bits. Just don't do it. You'll regret it. If you're going to do any kind of wood-working, bite the bullet before you start and get good equipment.

On top of the little things that went wrong, we just didn't have a lot of time. He was trying to get ready to deploy, I was trying to keep the kids from killing each other while helping him get ready. The only time we had to do any work on the table was after they went to bed at night. But... we finished it. Putting it together anyway. It was 11pm, the night before he left, but we finished it.

Please excuse my less-than-organized-at-the-moment garage, and be comforted by the fact that neither the duo or the dogs are allowed out here. It's a death trap, I know.


Here it is, put together, and mostly sanded. I still need to finish sanding the legs on one side, and then go over again with a finer grain. Then it needs to be stained and sealed. God knows when this thing will finally be done, but so far I love it.

Saturday, July 24, 2010

Day 1

Yesterday was, to put it lightly, a rough day. *ding ding* Let Round 4 officially begin. ::sigh::

So, I had all these grand ideas of how I was going to be super productive this weekend. I was going to do every piece of laundry, and clean this house until it was spotless, because doing that helps keep my mind off things. Yeah, that didn't happen. Instead, I've spent the day playing and cuddling with my babies, being a bum on the couch, and maybe feeling a little bit sorry for myself.

We also made a paper chain to count down the deployment. Ok, I made a paper chain while trying to keep the babes from chewing on scissors or swallowing staples. One link for every week that he's supposed to be gone. It doesn't look very long in the picture, but it's so long that I can drape it around my neck and it's only an inch from touching the floor on both sides. And I'm pretty tall. It's a little depressing to look at now, but I'm going to take pictures of it throughout the year, and hopefully it will become something I look forward to seeing get shorter and shorter as the time goes.


Then this morning, Riley decided that a picture of a random soldier in uniform was "Dada." She cried when I told her no. And kept insisting that it was, in fact, her Daddy. ::heavier sigh:: So I printed out these pictures of the babes and their Daddy from yesterday and laminated them. They've been carrying them around all day, talking to Daddy and reading him books.

And since I haven't showed these yet, these are the special gifts that the hubs got the babes from Build-A-Bear before he left. They love them, and sleep with them every nap and every night.


So yes, this is how I've spent my day so far. I may not have gotten any cleaning done, but it's been a better day than I thought it would be. That's really all I can ask for at this point.

Sunday, July 18, 2010

Sweet Pickles!

This is my FIL's recipe, and you are lucky enough that he has allowed me to share it. I have no idea where he got it, but these are seriously some of the best pickles ever. One note: He always uses the huuuuge jar of Best Maid pickles. You know, those ginormous, insanely sour, circus freak pickles? Well, I don't have room in my fridge to store a giant bucket of pickles, so I scaled it down and used a quart jar of Kosher Dills. Apparently they don't yield quite as much juice as the huge pickles do, but they still taste just as amazing.

Ok, so first step. Empty the jar, drain the juice, and rinse the pickles and jar with cold water.


Step 2: Slice the pickles into hamburger slices. Put the slices back in the empty jar.


Step 3: Take a 12 ounce jar of pickled jalapenos, and drain about 1/3 of the jar. Do not rinse the jalapenos. Add the jalapenos to the top of the pickle jar. I know it probably seems like a lot, but the pickles will not be burn-your-mouth hot. It's ok if you don't believe me right now, just do it. You'll see. They'll have the perfect bite to them, but won't really be spicy.


Step 4: Ok, here's where you call me insane. You're already thinking your tongue is going to fall out of your mouth with that many jalapenos, right? Now add about 2 cups of sugar to the top of the jar. "Ok Leslie, you want me to burn my tongue off, and now you want to give me a mouth full of cavities too? What is my dentist going to think when I come waltzing into his office with no tongue and holes in my teeth?!" Just do it. You'll thank me later. Once the sugar is in the jar, put the lid back on. Do not add water or liquid of any kind. The pickles will make their own juice. Make sure you screw the lid down tight. And resist all urges to mix everything together. I have undiagnosed OCD too, I know it's hard to resist, but if I can do it so can you.


Step 5: Now here's the hard part. Let it sit at room temperature for 24 hours. Don't touch it, don't shake it, don't open the lid... just don't. At the 24 hour mark, THEN you can mix it all up. Just roll it around and let everything melt together. Then... don't touch it for another 24 hours.


After the second 24 hours (so that's 48 total) roll it around and mix it all up again. If you're really impatient you can taste them now. I know, I am too, and I always have to taste at this point. Soooo good. Now you can put them in the fridge. After a good 24 hours in the fridge they'll be nice and crispy. And sweet. And cold. With the perfect bite. If, like mine, there isn't quite enough juice to cover all the pickles, just roll the jar around each time you eat a pickle until there are few enough pickles in the jar to fit in the juice. ;)

If you make your own pickles you can probably work this recipe somehow to be used to pickle your fresh cucumbers. I have no idea how it would work, but someone out there has to be creative enough to try and figure it out.

Happy nomming!

Friday, July 16, 2010

I finally got my sewing machine out today

It's only been packed up since we moved. 2 months ago. I didn't realize how much I missed it until I got started on today's projects.

Speaking of... BFF is pregnant. Like hugely, almost ready to give birth pregnant. I promised I'd make her new daughter a coming home outfit. 6 months ago. Slacker much? Yep, that would be me. But, it is now finished, and she hasn't even given birth yet, so really I'm ahead of the game, right? Just smile and nod.

Oh, and just for the record... sewing teeny tiny newborn clothes is a bitch. Really. My fingers were stabbed so many times because I underestimated how much space I had to work with when pinning seams.


I also made a gift for BFF's oldest daughter, who turns 7 next month. Unbelievable. She cannot already be 7. ::shakes head:: Her party is tomorrow since her dad may be deployed before her actual birthday. Yes, I made her gift not even 24 hours before her party. Just another example of my slacker ways.


It's a purse. Clearly. Nothing fancy, but it's got a flower, and she's 7 (well almost) so hopefully she'll love it. I'll probably find a few little things to put in it before the party tomorrow to make up for it being such a "meh" gift. ;)
So yes, that's been my afternoon. Teeny tiny clothes and the simplest purse you've ever seen. Now to put the duo to bed and do some more work on the table.
Oh, and a heads up: Sometime in the next few days I'll be posting the best sweet pickle recipe you've ever seen. Really. I don't even like sweet pickles all that much, and I think these things are amazing.

Wednesday, July 14, 2010

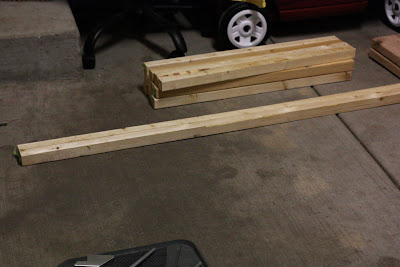
Introducing my new dining room table...


Obviously it still has a ways to go, but all the pieces are cut and ready to be put together! It'll probably take me 2 days to build it and then another 2 weeks to stain and finish it. LOL
The total cost for the wood I needed: $48.40. Add the cost of screws, wood putty, and sand paper and this table will cost just over $60 before being stained. Well under $100 when it's totally finished. Sweeeeeeet!

Tuesday, July 13, 2010

My beautiful babies

So, I haven't updated in several days. Obviously. It's been rather... crazy around here lately. I haven't done much that would be interesting to read about on here, so I haven't posted. Soon though, I promise! For now, enjoy these pictures of the duo when we were outside a little while ago.


Saturday, July 10, 2010

One More Time, Shall We?

Let's give this public blog thing one more shot. I guess I could have just picked back up with the old one, but I think it's time for a fresh start.

I won't go into details about my life right now. If you're reading this, then chances are you know me, or at least e-know me, well enough already.

I decided I need a place to showcase all my random hobbies. What does that mean for you? Lots of duo pictures, lots of pictures in general, updates on sewing projects (if I ever get my table set back up after the recent move), and a front row seat to the likely mess I'm going to make of wood-working in the near future. It should be somewhat entertaining at least.

Sit back, kick your feet up, maybe take a short vacation in the time it will take me to make new posts, and enjoy!


And just for fun, here's a picture from our recent vacation to "the lake" in Texas. You know, because there's only one lake in Texas of course. ;)